


Table of Contents
ToggleClash Royale maps aren’t just pretty backdrops, they’re the invisible third player in every match. The arena layout determines where you place troops, when you cross the bridge, and whether your defense can hold. Players who understand map mechanics have a concrete advantage over those who just plop cards down and hope. This guide breaks down how to read every arena, adapt your deck strategy to specific layouts, and execute both offense and defense like a pro. Whether you’re grinding ladder or preparing for tournament play, mastering map awareness will immediately improve your win rate.
Key Takeaways
- Mastering Clash Royale map mechanics and arena layout gives you a concrete strategic advantage by determining optimal card placement, tower positioning, and defensive efficiency.
- Adapt your deck composition to each map type—narrow maps favor tight defense with splash units, while wider maps reward split-lane threats and patient elixir management.
- Bridge crossing timing and push placement directly depend on map geometry; exploit lane asymmetries and opponent cycle patterns by understanding travel times and engagement distances.
- Efficient card cycling varies by arena—narrow maps require faster cycle speeds with cheaper cards, while wider maps allow time for expensive, high-impact plays.
- Avoid common map mistakes like ignoring asymmetries, misreading engagement distances, or overcommitting to one lane; instead, study specific map geometry before climbing ladder.
Understanding Clash Royale Map Mechanics and Arena Design
How Map Layout Affects Gameplay and Card Placement
Every map in Clash Royale is built on one fundamental principle: asymmetry creates strategy. The positioning of your King’s Tower, the width of your lanes, and the distance from your towers to the center bridge all influence how you deploy cards. A narrow map forces tighter positioning: a wide map spreads pressure across multiple lanes.
When you spawn a unit, you’re not just thinking about DPS or defensive value, you’re thinking about position. A Hog Rider placed in the back of your lane has 8+ seconds of travel time. Place it too early on a map with long lanes, and your opponent gets a free cycle rotation. Place it at the exact moment their defense is vulnerable, and it becomes a nightmare to stop.
Card placement depth matters too. Some maps compress the play area between the river and your towers, making it harder for troops to fan out. Others have wider lanes that let units split and force your opponent to divide their attention. If you’re running a deck with aerial units like Balloon or Dragons, a map with wide air coverage lets you threaten multiple lanes simultaneously.
The bridge position relative to your towers changes how quickly troops reach the enemy. Shorter bridge-to-tower distances mean faster engagement times. This affects everything: cycle speed becomes more critical, response windows shrink, and one-hit kills matter more. Longer maps reward patient cycling and tank-and-spank strategies.
The Role of Bridges, Buildings, and Defensive Structures
Not every map has the same defensive infrastructure. Some feature buildings (like Cannon placeholders or Inferno Towers), while others rely purely on tower coverage. The bridge itself is pivotal: troops cross it at specific points, and maps vary in how many crossing points exist.
A single central bridge means all pressure funnels through one lane until you’re ready to split. Dual bridges or bridge variation give both players options, increasing decision complexity. Pro players read these patterns instantly, they know which lane their opponent prefers and where defensive turrets will be most effective.
Buildings placed on the map (or implied by design) create natural choke points. A Cannon protecting the center lane forces air units or ranged troops to go wide. An Inferno Tower near a tower entrance punishes tank-heavy pushes. Understanding where your opponent will likely defend shapes your entire offense. If the map layout suggests they’ll stack units near a particular tower, send pressure elsewhere.
Tower range varies slightly by map perspective and design. Some arenas make towers feel closer to the action: others feel stretched. This changes how much value you get from chip damage and when troops die before reaching their target. Memorizing exact ranges prevents misplays.
Complete List of Current Clash Royale Maps
Classic Arena Maps and Their Strategic Value
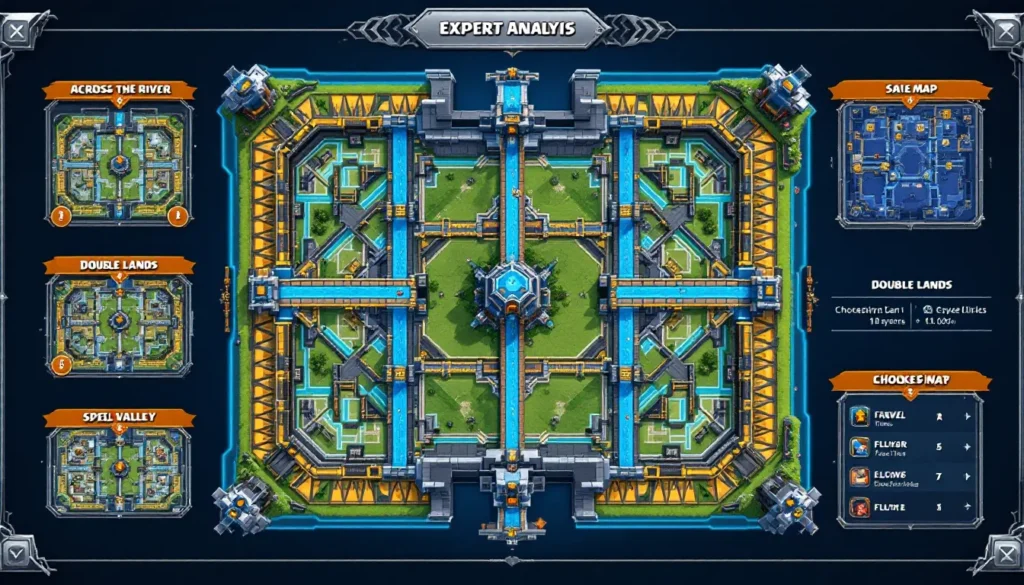
The core roster of Clash Royale maps rotates seasonally, but a few have stood the test of time. Across the River is the most symmetrical map, offering balanced gameplay with clear lane definition. No player gets a positional advantage: victory comes from card synergy and reads. This map rewards proactive cycling and spell timing since there’s nowhere to hide.
Double Lands features two islands with separate bridges, creating a dual-lane focal point. Both players must defend wide, making it harder to stack massive pushes. Decks with split-lane threats like Hog Rider plus Balloon shine here. Tower coverage is equidistant, so positioning depth becomes crucial.
Spell Valley is a classic with a single central focus. Many advanced players prefer it for ranked because the lack of complexity rewards actual game knowledge over map gimmicks. If you’re climbing the ladder on your road to Clash Royale Arenas: Master Each Level for Unmatched Victory, understanding this map’s nuances is essential. The tight positioning forces tight defense and punishes overcommitment.
Pig Push (when available) introduces the twist of a central asset both players can leverage. This changes the dynamic significantly, control of that space becomes a wincon, and cycle decks that can claim it repeatedly have inherent value.
Seasonal and Special Event Maps
Supercell rotates special event maps monthly, and each introduces unique mechanics. Heist mode maps, for example, feature a central vault both players attack. The pressure point is fixed, eliminating lane variety but emphasizing how quickly you can generate offense.
Rage Rooms and similar gimmick arenas introduce persistent on-map effects (like rage spells or freeze zones). These aren’t standard ladder maps, but they teach you to adapt your playstyle rapidly. What works in Spell Valley doesn’t transfer directly to a rage-infused arena.
Seasonality matters because meta shifts with map availability. When Double Lands is in rotation, Mortar and X-Bow popularity drops because ranged buildings struggle with split pressure. Switch to Spell Valley, and control-heavy decks resurface. Smart players track the seasonal rotation and adjust their climb strategy accordingly.
Event maps often feature hard counters or soft counters to popular cards. A map with tight central lanes nerfs spread-out decks and buffs Wizard or Valkyrie splash. Understanding these meta shifts before a season drops gives you weeks of advantage.
Defensive Strategy for Each Map Type
Adapting Your Deck to Map Layouts
You can’t run the same 8-card deck blindly across all maps and expect consistent results. Effective deck composition responds to the arena you’re facing. A control-heavy deck with Inferno Dragon and Tesla dominates tight maps where swarms get bottlenecked. Swap to a wider map, and those same cards lose value against split-lane pressure.
When building a defensive core, prioritize what the map demands. On Across the River, you need an answer to both lanes equally. Include a ranged splash unit (Wizard, Executioner, Ice Wizard) that covers width. On Double Lands, twin defensive threats or a single card with excellent coverage becomes mandatory.
Tank busters matter more on maps where tanks funnel predictably. A Tombstone placed in advance denies P.E.K.K.A. or Giant pushes on narrow paths. On open maps, that same card might be overkill since threats have more mobility. Reserve that deck slot for something else.
Consider cycle speed relative to map design. Narrow maps force faster decision-making because elixir accumulates faster when fewer cards are on-field simultaneously. You need cards that cycle quickly so you’re never caught off-guard. Wider maps reward patient, expensive cards because you have more time and space to manage them.
Link internally: understanding which Clash Royale Best Cards fit your playstyle is the foundation. Map adaptation builds on top of that knowledge.
Positioning and Elixir Management Across Different Arenas
Elixir management shifts dramatically based on arena layout. On maps with long travel times, troops spend more time in-flight before engaging. This delays your elixir regeneration window and punishes you for overcommitting early. You need tighter, cheaper cards to maintain tempo.
Positioning within your own arena determines how towers help. Defensive units placed close to your tower get tower support faster. Units placed near the river engage enemies sooner but might die before tower support arrives. The map’s visual design cues you on optimal placement depth. If towers look close to the river, use that proximity. If they’re set back, position accordingly.
Three-musketeers, split lanes, and push swaps require different tower spacing to execute. On symmetrical maps, you have equal options left and right. Asymmetrical maps force you to prioritize one lane, making your positioning pattern predictable. Vary your depth and lane choice to keep opponents guessing.
Chip damage accumulation varies with map layout too. On maps where your troops naturally reach the tower with support, chip becomes secondary. On maps where enemy defense excels, chip damage from spells and ranged units becomes your primary win condition. Place your Fireball practice accordingly, sometimes you’re fishing for tower damage, not defending.
Tower destruction order matters. Some maps encourage you to take a tower on one side first, then rotate pressure. Others require simultaneous dual-lane pressure to overwhelm defense. Read the map, not just the opponent’s deck.
Offensive Tactics for Popular Clash Royale Maps
Best Push Placements and Bridge Crossing Strategies
Offensive pushes live or die based on timing, but push placement determines everything beforehand. On maps with a central bridge, you can build a push in your back lane and force your opponent to make a prediction. Will you send it left or right? If they defend center, split lane. If they split, go center.
Hog Rider placement is the perfect example of map-dependent strategy. On Across the River, placing it in your back-right lane gives it a fixed path to the right tower. Your opponent can predict this and position accordingly. Place it from your left lane, and it travels farther but your elixir trade might be worse if they have ranged troops ready. Vary which lane you send it from to maintain pressure.
Balloon placement feels different on open vs. tight maps. Open maps let you place it behind a tank in your back lane, and it has time to build a threat. Tight maps force more immediate play because there’s no time to set up. Push immediately, or it gets countered before value accrues.
Bridge crosses should exploit map asymmetries. If one bridge has better tower positioning for your troops, cross there. If the opponent just blew their defensive elixir on one lane, cross the opposite lane. Maps telegraph these decisions, study the layout before the match begins.
Mirror and cycle decks particularly benefit from understanding bridge mechanics. If you can anticipate your opponent’s cycle based on map speed and typical responses, you cycle your best counter and maintain lane control. Resources on Pocket Tactics and similar strategy sites detail cycle timing for popular decks, though map adaptation is your personal responsibility.
Countering Common Defensive Setups
Once you’ve pushed across the bridge, opponent defense activates. Maps determine what defensive setups are viable. A Cannon in the center blocks many mid-ladder pushes effectively on narrow maps but is nearly useless on wide maps where you can path around it.
Inferno Tower placement changes by arena. On maps where it protects the tower well, it’s punishing. On maps where it’s set back, you have time to bait it or split your push. Know the defensive building positions before the match.
Spells become movement tools as much as damage tools. Tornado pulls troops toward your tower but the positioning angle varies by map. On some arenas, a Tornado from center pulls directly toward defense. On others, angle matters significantly. Understand the geometry.
Zap and Log ranges matter map-to-map. Some arenas compress the space so a Log from your tower hits troops almost immediately. Others spread units so far that spell timing requires prediction. Test these interactions in a practice match before climbing.
Countering Mirror decks on maps with predictable defense is crucial. If the opponent always defends left with a Cannon, mirror that defense with your own Cannon placement next cycle. Deny them the advantage. Maps where both players have equal defensive real estate reward this tit-for-tat strategy most. Check Twinfinite for detailed counter-guides to meta decks.
Advanced Map Strategy: Pro-Level Tips and Techniques
Reading Opponent Patterns and Map Control
Pro players don’t just react to the opponent’s cards, they read the map and predict behavior. After one full cycle on ladder, a skilled player knows where the opponent will defend. If they’ve placed two Cannons in the center on consecutive attacks, they’re committing to that lane. Next cycle, threaten the opposite lane and watch them panic.
Map control isn’t about owning territory: it’s about controlling where your opponent must spend elixir. Force them to defend inefficiently by exploiting map layout. A Hog Rider sent down the right lane on Across the River when they’re light on right-side defense isn’t luck, it’s reading the map state and your opponent’s cycle.
Bridge pressure timing synergizes with map knowledge. You know how long it takes a Giant to reach the tower from your back lane. You know when they’ll have elixir to defend. Send it when you’ve predicted a light cycle. This requires memorizing travel times by card and by map, then executing on reads. The Clash Royale All Cards guide includes speed stats, but real mastery comes from live practice.
Mirror matches on symmetrical maps become pure skill. When both players have identical resources and map advantages, positioning, timing, and cycle management separate winners from losers. A single card placement in the optimal position can swing a 50-50 game into a win.
Asymmetrical maps create inherent imbalances. Some corners favor one playstyle over another. Recognize which side of the map benefits your deck. If you’re running Mortar, position it where tower support helps most. The map will telegraph the ideal placement.
Cycling Cards Efficiently Based on Arena Geometry
Card cycling speed changes with map engagement time. Narrow maps with quick engagement mean cards cycle faster because they’re deployed, engaged, and cycled within seconds. Wider maps stretch this timeline. On wide maps, you might cycle 2-3 cards while your initial push is still traveling.
Efficient cycling means knowing which cards to hold and which to cycle out. On a map favoring ranged defense, hold your Ice Wizard or Electro Giant until you need it. Cycle out cheap defensive cards you won’t need until later. The map’s defensive structure determines this priority.
Double-cycling (cycling two defensive cards in sequence) works better on maps with extended engagement. Your opponent’s push takes time to reach you, so you have windows to cycle your hand. Narrow maps don’t grant this luxury, you need your best cards ready immediately.
Specific card timing on maps: Rocket placement on maps with spread-out defense might hit fewer units than on compressed maps. Know the likely defensive unit positions and hold your spell accordingly. On wide maps, a Rocket for damage is better than a Rocket for value trades.
Advanced players track card cycle rotations relative to map timer. After 2:30 of gameplay, you know roughly how many times each card has cycled and when specific threats (like Hog Rider or Balloon) are incoming. Maps with longer engagement windows stretch this timeline, giving you more predictability.
Common Map Mistakes and How to Avoid Them
The most common mistake? Ignoring map asymmetries. Players develop a single playstyle and apply it to every map without adaptation. If you always defend right-side pushes because that’s where you’re comfortable, a smart opponent will attack left repeatedly. Know the map before the match: adjust your positioning strategy accordingly.
Misreading engagement distance is brutal. Players assume a Hog Rider will reach the tower at the same time regardless of map. It won’t. On some maps, that 8 seconds becomes 10. Your elixir prediction fails. Your spell timing is off. Test travel times in a custom game if a map is new to you.
Over-committing to one lane early costs games. You see a push coming down the left on Double Lands and dump everything to defend it. Meanwhile, your opponent crosses right with a single Knight and gets two tower hits. Symmetrical maps require balanced defense. Don’t overreact to single-lane pressure.
Ignoring spell placement geometry loses you value. A Fireball placed toward one tower might miss units if the map is wider than you thought. A Tornado pull might work differently if tower positioning is shifted. Read the exact geometry before relying on range-dependent plays.
Placing defensive structures in the wrong spot is a classic low-ladder error. Cannon placement matters. On some maps, it protects the tower excellently. On others, place it two tiles further back and it becomes useless. Study defensive building positions for each map before climbing.
Not cycling enough on slower maps is frustrating. You get distracted managing one lane and forget to cycle your spell rotations. By the time you need Log, it’s at the bottom of your deck because you didn’t cycle it out. Map-dependent pacing prevents this. On slow maps, cycle proactively.
Missing the win condition due to map focus is another killer. You play around the map perfectly, defend immaculately, but forget your actual win condition. If your deck needs Rocket damage to tower, stop trying to defend perfectly and start cycling Rocket rotations. Let chip damage add up. The map doesn’t matter if you lose because you never activated your wincon.
Resources on Game8 provide detailed breakdowns of meta matchups, but that knowledge only applies if you’re reading your specific map correctly. Overlay map knowledge with meta knowledge for true mastery.
Conclusion
Clash Royale map knowledge separates casual players from grinders. The best players don’t just see a layout, they see opportunity. They understand how bridges funnel pressure, how towers support defense, and how lane asymmetries create predictability. They cycle cards with map geometry in mind, and they exploit opponent patterns by reading the arena state.
Start small. Pick one map rotation and grind it until you can describe every choke point, every tower position, and every optimal placement. Then learn the next map. Over a month of consistent ladder play, you’ll develop an intuition for new arenas. That intuition translates directly into wins. You’ll defend more efficiently, push more effectively, and read your opponent’s hand faster because you understand the map’s constraints.
The beautiful part? Map knowledge is free. It doesn’t require better cards, higher levels, or a whale account. It just requires attention and practice. Master Clash Royale maps and you’ve unlocked a hidden advantage that many players never develop. Your win rate will thank you.