


Table of Contents
ToggleJunkertown. Even the name evokes that dusty, explosive chaos of a map that can make or break competitive matches. Whether you’re grinding ladder or prepping for ranked seasons, understanding Overwatch Junkertown’s layout, sightlines, and positioning separates decent players from those who consistently carry their teams through payload pushes. This desert battleground demands precision, not just aim, but strategic positioning, ultimate economy management, and team coordination that punishes every misstep. If you’ve ever felt lost in Junkertown or wondered why your team keeps getting picked before the first point, you’re about to get answers backed by concrete positioning data and hero synergies.
Key Takeaways
- Mastering Overwatch Junkertown positioning—especially high-ground control on the roofline, water towers, and building angles—separates competitive climbers from ladder players stuck in lower tiers.
- Track enemy ultimate economy as carefully as your own; push when you have 2+ ults and defenders have 1 or fewer, and reset when disadvantaged to avoid throwing rounds through poor timing.
- Coordinate synchronized ultimate usage within 2–3 seconds on second and final points; staggered ults waste impact since defenders will reposition and counterplay before your team can capitalize.
- Avoid common Junkertown mistakes: never ignore high ground, don’t stagger on payload pushes, ensure your defensive comp has wave-clear with ranged heroes, and flank for picks rather than prolonged 1v1s away from your team.
- Payload momentum is critical—once the payload rolls at final point, maintain relentless pressure and keep defenders from resetting; two consecutive won team fights often close out the round faster than any solo carry play.
What Is Junkertown and Why It Matters
Junkertown is a payload escort map set in the Australian outback, specifically, an abandoned junker compound where teams push a payload through the desert. It’s been a mainstay in Overwatch competitive rotation since it was introduced in 2017, and it remains one of the most decisive maps in the game.
Why does Junkertown matter? Because it’s a map that heavily rewards structured gameplay and punishes disorganization. Unlike some maps where carry potential from a single player can swing rounds, Junkertown demands cohesive team fights, correct positioning, and awareness of multiple angles. The map’s large, open spaces with distinct high-ground positions and tight chokepoints means every hero role has critical positioning responsibility.
For attackers, it’s about maintaining momentum through three distinct chokes. For defenders, it’s about setting up cross-fires and forcing unfavorable team fights before the payload touches each checkpoint. The meta on Junkertown has also shifted over Overwatch 2’s patches, recent balance changes have favored certain tank and damage heroes, making hero pool selection essential.
Understanding Junkertown specifically helps you climb because ladder teams often neglect map-specific strategy. While players spend time learning general mechanics, those who study this map’s positioning angles gain a tangible edge.
Map Overview and Layout
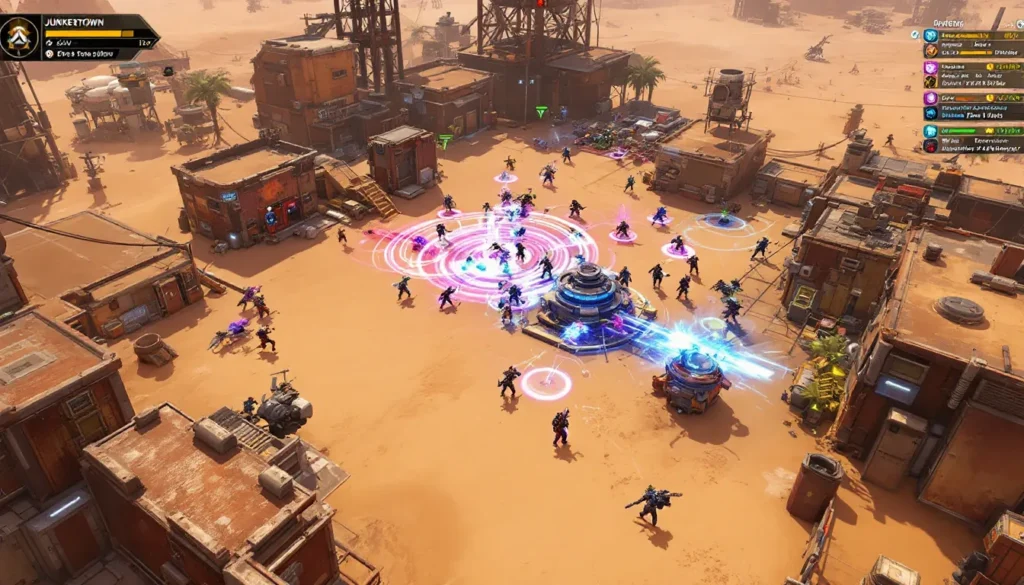
Junkertown spans roughly 200 meters from first point to finish, with three distinct defensive positions. The map has a narrow start area leading into a wider mid-section, then compresses again at final point. High ground dominates most of the map, the roofline on the left side of first point, the water towers near second point, and the buildings flanking final all provide angles that force defensive coordination.
The spawn doors are relatively far from first point compared to other maps, which means the opening engage matters heavily. Defenders get a slight positional advantage early, but attackers have more breathing room if they take a methodical approach.
First Point Gameplay and Positioning
First point is the widest, most open area on the map. The payload starts in a narrow tunnel, then opens into a large courtyard with rooflines and structures on both sides. This is where teams decide the entire round’s trajectory.
For defenders, the high ground on the left (roofline above the attacker spawn) is the premium position. A hitscan damage hero or Widowmaker holding that angle can delete squishies before the fight even starts. The right side has a tower that Zenyatta or long-range supports can abuse to deny close-range fights. Both positions should feel oppressive to attackers if the defender positioning is clean.
For attackers, the goal is to safely enter the courtyard without feeding kills. Playing around the payload for cover, using abilities to clear angles (think Genji dashing onto the high ground or Pharah securing space above), and waiting for ultimate economy advantage matters more than rushing.
A common attacking pattern: stall and farm ultimates on the payload while defenders play for picks. Once attackers have ult advantage, they commit to a focused push with brawl-heavy heroes like Reinhardt and D.Va.
Second Point Control and Team Coordination
Second point transitions the map from wide-open to more structured. The payload sits in a mid-range area with water towers on the right and buildings on the left. This is where coordination starts separating tiers.
Defenders want to establish positions on high ground (water tower right side is crucial) and coordinate damage output to burst targets fast. The payload has less cover here than first point, so attackers are more exposed. A Tracer with good positioning can farm the right flank while your main team secures the center.
Attackers need synchronized ultimate usage. Unlike first point where patience pays off, second point often requires a calculated engage where multiple ults pop within seconds of each other. Genji blade, Dragonblade Hanzo, and Tactical Visor Soldier can shred through typical second-point defensive setups if timed right. Coordination is non-negotiable, solo ults feeding into an organized defense cost rounds.
Wave clear becomes critical here. If defenders maintain high ground control and force attackers into a slugfest, the defender comp (usually more ranged) has the advantage. Attackers must respect that and adjust if they’re getting out-traded.
Final Point and Payload Strategies
Final point compresses dramatically. The payload enters a narrow corridor flanked by structures, making it the most chokepoint-heavy area of the map. This is where skilled defensive setups shine, and where bad positioning gets you rushed down.
Defenders traditionally set up a front-line tank (like Sigma or Rein) with supports off-angle, and damage heroes securing flanks. The goal is creating a wall the payload can’t break. Zoning ults like Whole Hog or Sound Barrier become lifeblood, they force attackers to split up or waste resources.
Attackers, meanwhile, need to burst through cohesively. Playing around the payload for cover, using movement abilities to stay alive while the team pushes, and minimizing stagger deaths matters hugely. A single pick on defense at final point often extends the defensive hold by 30+ seconds, so attackers should group tightly and commit to a calculated team fight rather than trickling in.
Payload push momentum matters most here. Once you touch the payload, momentum snowballs. Teams that manage to secure final point often close it out cleanly.
Best Heroes for Junkertown
Junkertown’s map layout creates a meta distinct from other payload maps. High ground, sightlines, and the open spaces favor certain heroes while creating hard counters.
Tank Heroes and Positioning
Reinhardt is king on Junkertown. His Barrier Field provides mobile cover for payload pushes, and his Earthshatter on high ground can wipe teams instantly. Coordinated Reinhardts with good shield timing win rounds.
Sigma offers flexibility. His Kinetic Grasp negates spam from range, and Accretion can catch isolated targets on high ground. He’s less oppressive than Rein in the wide areas but gives teams more sightline flexibility.
D.Va excels on first and second point where space is wide. Her Defense Matrix deletes projectiles from high-ground defenders, and her Boosters let her secure those angles herself. Final point becomes harder for D.Va since brawl-heavy comps dominate closer spaces.
Junker Queen is underutilized on this map. Her Commanding Shout creates playmaking potential in close quarters (especially final point), and her close-range damage is oppressive if she gets space. She thrives when teams leverage her ult for engagement windows.
Damage Heroes for Maximum Impact
Hitscan damage heroes (Soldier, Widowmaker) dominate first point if they secure high ground. Widowmaker especially can shut down entire engage patterns if she’s freely sniping from the roofline.
Genji and Tracer are staple flankers here. Genji’s dash and reflect provide mobility around structures, while Tracer’s blinks let her secure water tower positions and kite back through the open spaces. Both thrive on Junkertown compared to tighter maps.
Pharah secures air superiority, especially on first and second point where hitscan defenders are spread thin. Landing Barrage from above the roofline guarantees picks if defenders aren’t coordinated.
Symmetra is sleeper-strong on defense. Her turrets cover flank routes, and her Teleporter lets defenders maintain spawning near point after picks. Recent patch buffs have made her more viable on maps like Junkertown.
Support Heroes and Sightline Management
Zenyatta is premium first-point defense. His range lets him hold high ground safely, and Discord Orb turns any defending ult into a team fight win condition. He’s vulnerable to flanks but oppressive if protected.
Lucio provides grouping and Amp It Up for fast payload pushes. His mobility and beat let him survive spam-heavy final-point fights where squishier supports get picked.
Ana works on defense for sleep dart access and Sleep dart into stun combos. On offense, she covers flanks and provides burst healing when the main team is engaged in brawl.
High-Ground Positioning and Flanking Routes
High ground determines Junkertown fights. Unlike maps where high ground is optional, here it’s the difference between winning a team fight and getting destroyed.
First point high ground (left side roofline): This is the most impactful position. A single defender here forces attackers into an awkward position, they either clear it with cooldowns (wasting them before the main fight) or approach from below (into spam damage). Attacking teams should assign a Genji or Pharah specifically to contest this. Defenders should be rotating someone strong here early.
Water tower (second point right side): This position gives free vision of the entire courtyard and payload approach. A Widowmaker or Zenyatta here punishes attackers for grouping. Attackers need to respect this angle or spend ults clearing it.
Building roofline (final point left side): High-ground here is more cramped but still oppressive. A defender positioned here can peek out for picks while staying relatively safe. Attackers need focused pressure or sentry ults (like Tactical Visor) to force a reposition.
Flanking routes exist on both sides. The right-side water paths let mobile heroes like Tracer and Genji avoid the main engagement and secure free damage. Defenders should expect flank aggression and position one player to counter-flank. Likewise, attackers should use these paths to secure picks on out-of-position defenders rather than all feeding into the primary engagement.
A critical tip: don’t over-extend into flanks. These routes matter for pressure and picks, not for dying behind enemy lines. Most ladder teams get picked while flanking because they overcommit and separate from their team’s ult rotation.
Common Mistakes Players Make on Junkertown
Most Junkertown losses aren’t from getting out-aimed. They’re from fundamentally incorrect positioning and team coordination.
Mistake 1: Ignoring high ground entirely. Players walk straight toward the payload without securing sight lines. Defenders then freely spam from elevated positions, and attackers get chunked before engaging. Solution: assign a player each phase to contest high ground early, even if it costs a cooldown.
Mistake 2: Staggering on payload pushes. Players trickle to the payload thinking they can farm ults. Instead, defenders pick them off one-by-one, attackers never reach ult, and the push dies. Solution: group before engaging. Wait for at least 5 players before committing to a payload push.
Mistake 3: Defender comps lacking wave clear. Teams stack heavy close-range heroes (like Reaper and Rein) without enough ranged damage. Attackers then freely approach the payload from range, and defenders get out-traded in the raw 1v1s. Solution: ensure your defense has 1-2 dedicated ranged heroes (Soldier, Zenyatta, Widowmaker) for sustained pressure.
Mistake 4: Bad flank positioning. Players take water-tower flanks but stay there fighting, separated from their team. Defenders collapse and the flank player dies while the main team fights 5v5. Solution: flank for picks, not for 1v1s. Trade a pick and back out if the flank is collapsing. Don’t force a 1v2.
Mistake 5: Wasting ults in team fights where you’re already winning. Attackers pop Blade when they have 5v3 advantage, overkill and a wasted ult. Defenders use Whole Hog when attackers are already spread. Solution: ult economy discipline. Use ults when forced or when they swing a losing fight, not when you’re already winning.
These mistakes compound across a match. One stagger death becomes a momentum shift, then a lost team fight, then a lost round.
Defensive Strategies and Payload Holding
Defending Junkertown requires layered setup. The ideal defensive strategy involves securing high-ground first, forcing attackers into unfavorable approaches, then using ults to hard-stop pushes.
Phase 1 (First Point): Defenders should immediately establish roofline control and aggressive spawn pressure. A Zenyatta on high ground with Discord Orb means attackers feed ults setting up. If attackers respect that and play slow, defenders farm ults faster than attackers. This is the ideal defensive scenario, make attackers farm ults while you gain ult advantage.
Positioning a tank slightly forward (not too far that they get picked, but far enough to zone space) forces attackers to engage before they’re ready. When they do engage while down ults, Whole Hog or Earthshatter becomes a “reset button” for the team fight.
Phase 2 (Second Point): Defenders maintain water-tower control and coordinate burst damage into clustered attackers. The payload itself has limited cover, so defenders can freely spam it. If attackers bunch on the payload, one well-placed Mei ult or Hanzo ult can wipe the engage.
The key here is not playing for picks, but for team-fight wins. Hold a stable formation, deny high ground flanks, and force attackers into the spam zone.
Phase 3 (Final Point): This is where coordinated defensive ults shine. Sound Barrier deployed right as attackers engage keeps the team alive through burst. Tactical Visor Soldier denies close-range brawl by trading with the Rein 1v1. A staggered Whole Hog ult can single-handedly break an engage if timed after the attacker’s first abilities.
Payload holding tips:
- Never abandon the payload to chase kills. Attackers touching it forces you to back out regardless.
- Position supports slightly back from frontline so they don’t get caught in spam.
- Rotate team to high ground preemptively, don’t wait for attackers to secure it first.
- Use ults defensively early (if attackers have ult advantage). Don’t save ults hoping to pop them later: denying a bad push now is worth more than a theoretical future ult.
Defensive Junkertown is about momentum. Once you stop a push cleanly, the pause gives you time to reset positioning, farm ults, and set up the next defense stronger. Most defensive wins come from stopping two consecutive pushes, not from a single nutty play.
Attacking and Payload Push Techniques
Attacking Junkertown is about reading the map phases and matching your engagement tempo to your ult advantage. Here’s how to push methodically.
Phase 1 (First Point – Opening Engage): Don’t rush. Walk down with the payload, respect high ground, and force defenders to engage you. Once they commit, that’s when you counter-engage. This sounds passive, but it’s ult-economy discipline. Defenders often pop ults first trying to secure space: you then counter with your own ults and take favorable fights.
Ask yourself: “Do I have ult advantage?” If no, hold space and farm. If yes, commit to a team fight. Walking into a 5v5 without ult advantage on first point is how teams throw rounds.
Phase 2 (Second Point – Coordinated Burst): This is where patience ends. You need synchronized ultimates. Call a number (like “ults in 3… 2… 1… go”). Multiple ults popping within 2 seconds overwhelms even coordinated defenses. Dragonblade + Barrage + Tactical Visor burst through shields and kill backline supports before defenders coordinate a response.
For this phase, standing back and poking isn’t enough. Commit to a calculated engage where multiple ults release almost simultaneously. Defenders won’t have time to ult-react appropriately, and you break through.
Phase 3 (Final Point – Brawl and Close): By final point, the map’s narrowness favors whoever commits harder. A Reinhardt + Lucio + Genji Blade engage into a tired defense wins more often than poke-damage from range. You have positioning advantage if you’re pushing the payload: use that. Don’t let defenders reset, keep spamming towards them, keep the payload moving, and close out the round.
Payload momentum is real. Once the payload is rolling, it’s much harder to stop than starting the next push. Final-point victories often come from simply not letting the payload stop, keep pressure up, rotate ults intelligently, and don’t let defenders breathe.
Timing cue: If defenders just used a big defensive ult (like Sound Barrier or Whole Hog), you have 25+ seconds before they ult again. Use that window for a push. Conversely, if defenders still have ults and your team is low on ults, reset and farm.
Attacking Junkertown rewards planning. Ladder teams lose because they push without coordination or ultimate timing. Teams that call ults, have a plan for each phase, and regroup smartly win most of their Junkertown rounds.
Team Composition and Ultimate Economy
Junkertown’s meta favors specific hero combinations. The best comps balance ranged defense with close-range engages, all while maintaining ult-farm efficiency.
Defensive Composition Example:
- Tank: Reinhardt (shields into spam, Earthshatter resets)
- Off-Tank: D.Va or Sigma (matrix/grasp negates poke)
- Hitscan Damage: Soldier or Widowmaker (high-ground control, free vision)
- Flexing Damage: Tracer or Genji (flank pressure, ult farming)
- Supports: Zenyatta (Discord into burst) + Lucio or Ana (utility)
This comp dominates first and second point because hitscan denies close range while Rein shields into spam. Final point becomes vulnerable because brawl heroes can threaten the backline.
Attacking Composition Example:
- Tank: Reinhardt (payload shield, initiation)
- Off-Tank: D.Va (matrix into enemy spam)
- Brawl Damage: Tracer or Genji (farming into close-range fights)
- Ranged Damage: Pharah or Hanzo (ult potential, high-ground threats)
- Supports: Lucio (boost payload into final point) + Ana or Zenyatta (heals/utility)
This comp excels at second-point synchronized engages because multiple damage sources can burst simultaneously. The combo of Boost + Blade or Boost + Barrage is brutal in narrow spaces.
Ultimate Economy Management:
Track enemy ult charges the same way you track your own. If Widowmaker has had 4 kills, she’s close to her next ult. If you’re down 2 kills, you’re likely down ults. Adjust your tempo accordingly.
For attackers: push harder when you have ult advantage, reset when you don’t. A simple rule: if you have 2+ ultimates and they have 1 or fewer, it’s a push window.
For defenders: use ultimates to stop disadvantaged fights. If you’re about to lose a 5v5, Sound Barrier keeps you alive long enough to reset and farm. Never save ultimates for a “better moment” if you’re losing the current fight, denying a bad push is better than farming ults for later.
Payload Push Ultimate Timing:
Attackers should pop ults within 2-3 seconds of each other on second and final point. Staggered ults (one player ulting, then 10 seconds later another) wastes their impact. Defenders will have reacted and repositioned.
Defenders should bait aggressive ult-pops from attackers, then counter-ult. If Genji blade comes out, Sound Barrier or Sleep Dart counters it. Attackers waste their ult, defenders’ ults are still available, and the reset happens.
Communication is crucial. Call ults clearly: “Blade in.” “Barrage ready.” This prevents accidental timing issues where one player ults solo while the team isn’t ready to follow up.
Mastering Junkertown in Competitive Play
Reaching mastery of Junkertown isn’t just about knowing hero positions. It’s about developing game sense for this specific map.
Vod review matters here. Watch professional Junkertown plays on Twinfinite or similar esports analysis platforms to see how top teams handle the phases you struggle with. If your first-point holds keep breaking, analyze how pro defenses set up their spawn pressure and positioning. If your attacking payloads stall at second point, see how high-ranking attackers handle Discord Orb or ranged defender spam.
Most players skip map-specific VOD review and wonder why they plateau. Junkertown rewards preparation more than raw aim because the positions are so determined by map layout.
Ladder practice tips:
-
Specialize in a role. Know whether you’re the roofline Widowmaker, the flank Tracer, or the payloadprotecting Rein. Multi-tasking positions is chaos: specialization builds muscle memory.
-
Call positions explicitly. Say “I’m taking high ground left” or “I’m flanking water tower right.” Ambiguous positioning leads to the entire team taking the same angles (like all five players hugging the payload).
-
Count enemy ults after kills. If you kill the enemy Soldier, know you have 30+ seconds before he ults again. Use that window. Conversely, if he’s been alive and free-farming, assume he’s close to ult and respect that.
-
Record and review your own replays. Specifically look for moments where staggering cost you (one player died unnecessarily before a main engage) or where your flank didn’t coordinate with the main team. These replays are harsh teachers but invaluable.
-
Adapt based on what’s working. If your first-point high-ground defense keeps getting deleted by Pharah, swap to a hitscan or dive the enemy backline instead. Junkertown rewards flexible thinking.
Recent patches have shifted the meta, certain tank adjustments and hero buffs have made specific comps more or less viable. Check the latest meta analysis on Game8 for seasonal meta shifts before climbing. A comp that was meta two patches ago might now have hard counters you weren’t prepared for.
Momentum is everything. Junkertown matches swing harder on momentum than other maps. Two won team fights in a row and attackers often close out. Two broken pushes and defenders run out of patience and start tilting. Recognize these moments and capitalize, push harder when momentum swings your way, stabilize when it swings toward the enemy.
Final thought: Junkertown is about positioning first, mechanics second. A player with great positioning and mediocre aim out-performs a player with great aim and no positioning sense on this map. Respect the high ground, group before engaging, and coordinate ults. Do those three things consistently and you’ll climb out of most ladder tiers.
Conclusion
Junkertown isn’t a map you master through generic advice. It demands specific positioning knowledge, phase-based strategy, and ultimate economy discipline. From first-point high-ground control to final-point brawl coordination, every phase has distinct mechanical and strategic demands.
The gap between a player who “knows” Junkertown and a player who truly excels there is the difference between watching pro plays and implementing what they see. Study the map’s sightlines, practice hero positioning, track enemy ultimate charges, and coordinate with your team. You’ll notice your Junkertown win rate improve faster than any other map.
If you’re serious about climbing, treat Junkertown as a specific skill to build. Watch IGN’s guide content for broader Overwatch strategy insights. Every hour spent learning this one map is an hour spent on a map that comes up repeatedly in competitive rotation. That focused practice pays dividends.
Now go into your next Junkertown match with a plan. Secure high ground early, respect ult economy, and group before engaging. That foundation alone separates climbers from stuck players. The rest is refinement and experience.