


Table of Contents
ToggleLijiang Tower is one of Overwatch 2’s most punishing yet rewarding maps, and mastering it separates casual players from those grinding competitive ranks. Set on a control map in a bustling Chinese city, it demands precise positioning, hero synergy, and split-second decision-making. Whether you’re a support main struggling with map awareness or a tank trying to hold the choke, understanding Lijiang Tower’s unique layout and sightlines is essential to climbing. This guide breaks down everything, from spawn rotations to ultimate economy, so you can stop getting fed kills and start winning rounds.
Key Takeaways
- High-ground positioning and verticality are critical on Lijiang Tower—controlling elevated areas directly determines which team wins team fights and secures objective control.
- Mobile heroes like Tracer, Genji, and Wrecking Ball dominate Lijiang Tower due to their ability to access high-ground positions quickly and disrupt enemy positioning.
- Establish map control before engaging the objective rather than rushing the point directly, as securing advantageous positions forces opponents into unfavorable fights or point surrenders.
- Ultimate economy on Lijiang Tower functions as currency—coordinate ultimate timing with teammates and trade only when securing objective progress to gain a competitive advantage.
- Avoid common mistakes like ignoring flanking routes, overextending for picks without team support, and wasting defensive ultimates reactively instead of saving them for crucial team fights.
- Understanding each control point’s unique layout—Night Market’s stalls, Garden’s multiple levels, and Control Center’s catwalks—enables strategic adaptation and consistent round victories.
Map Overview & Layout
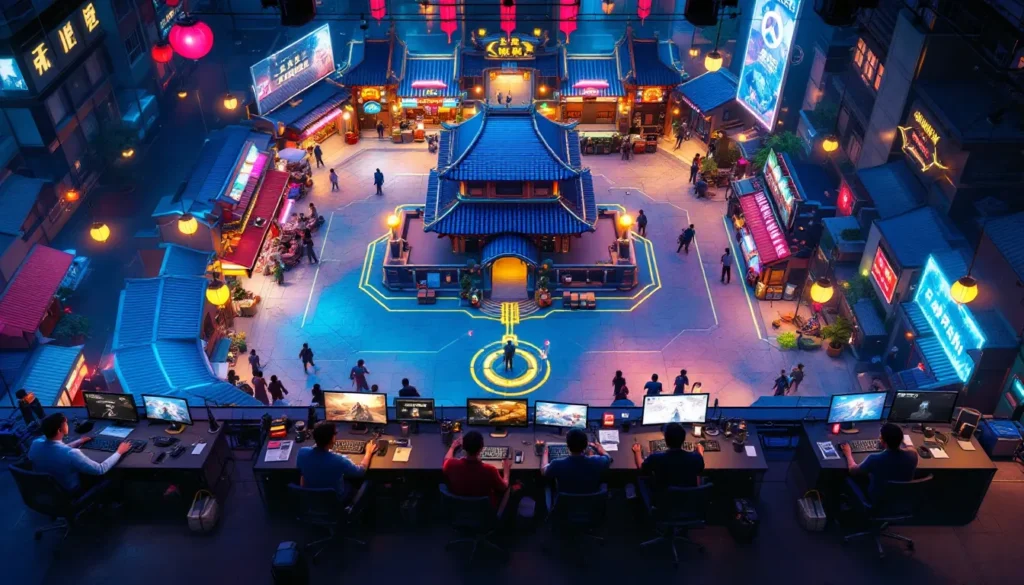
Lijiang Tower consists of three distinct control points, each demanding different approaches and hero pools. The map revolves around verticality, tight corridors, and high-ground positioning that punishes poor spacing.
The overall structure favors dive heroes and squishy ranged carries. Long sightlines between spawn and the objective create opportunities for picks, but narrow chokepoints can choke out deathballs entirely. Each control point has its own flavor: the night market feels claustrophobic, the garden plays more vertically, and the control center offers a mix of both.
The map is relatively symmetrical between attackers and defenders, but the spawns are positioned differently. Both teams spawn in interior rooms, but rotation paths vary significantly. Understanding which routes are safest and which are fastest determines whether you’ll contest the objective with time advantage or arrive as cleanup crew.
Height advantage is everything on this map. Whether it’s perched on the market stalls, climbing the garden structure, or positioning on the control center’s elevated platform, gaining high ground often means securing the round. Low-ground players are perpetually at risk of harassment from above with limited escape routes.
Objective Locations & Control Points
Lijiang Tower rotates between three control points over the course of a best-of-three match. Understanding each objective’s unique characteristics is crucial for adapting your strategy.
High-Ground Advantages & Key Positions
Night Market is the most vertical control point. The objective sits in an open plaza surrounded by market stalls and rooftops. High-ground dominates here, teams controlling the stalls overlooking the point have sight lines onto anyone attempting to contest. Widowmaker, Tracer, and Genji thrive here due to their mobility allowing them to access these elevated positions quickly.
The critical high-ground spots are the stalls directly above the point and the opposing stalls across the plaza. A dedicated player can force four enemy players off the objective simply by maintaining positioning. Supports should play behind cover on the point itself: staying in the open invites burst damage from above.
Garden is the most chaotic control point, featuring a large central structure with multiple levels and sightlines. The objective is positioned in a courtyard surrounded by walls, pillars, and a central structure that creates natural cover. Height advantage matters here too, but escape routes are abundant.
Key positions include the balconies overlking the point and the ledges flanking it. Teams often split forces to secure multiple angles simultaneously. Barriers become less effective due to the open nature, making positioning and awareness more important than shield durability.
Control Center features an elevated platform in the middle of a building’s interior. It’s less vertically demanding than the other two points but requires understanding sightlines through windows and doorways. The objective sits elevated, making certain heroes like Reinhardt less ideal for direct point presence.
High-ground here means the catwalks and upper levels surrounding the point. Unlike Night Market, accessing these positions takes longer, giving the defending team time to establish presence. Window control becomes critical, controlling who can peek through the main sightline often determines the fight.
Best Hero Picks For Lijiang Tower
Lijiang Tower’s verticality and tight corridors favor specific hero archetypes. Picks that abuse positioning and mobility significantly outperform traditional deathball comps.
Tanks To Dominate The Map
Wrecking Ball dominates Lijiang Tower in both attack and defense. His ability to pounce onto high ground, disrupt positioning, and escape danger makes him essentially a required pick in coordinated play. Use Piledriver to separate enemy supports from their team, then roll away before retaliation arrives.
Sigma provides invaluable defense through his barrier placement and Kinetic Grasp. On tight chokepoints, his barrier denies pushes entirely. Accretion stuns opponents in narrow spaces where escape options are limited, creating guaranteed picks for your team.
Reinhardt works on control center but struggles on night market and garden. His limited mobility prevents accessing high ground, and tight corridors don’t provide space for hammer swings. Only pick him if your team plays a careful, positioning-heavy strategy.
D.Va thrives when enemy backlines are isolated. Defense Matrix nullifies enemy ultimates in the tight corridors, and her mobility allows aggressive flanks. But, she struggles against hitscan damage in open areas.
Junker Queen is situationally strong, particularly for denying enemy space and applying pressure. Her close-range dominance shines in corridor fights, but she’s vulnerable to poke damage from range.
Damage Heroes For Maximum Impact
Tracer is arguably the strongest DPS on Lijiang Tower. Her mobility trivializes high-ground access, and her close-range burst secures picks on isolated supports. Use Blink to weave between cover, maintaining aggression while staying alive. Her ultimate forces enemies to scatter or die, resetting team fights entirely.
Genji provides comparable high-ground access with stronger dueling potential against other mobile heroes. Wall Climb lets him reach nearly any position on the map. Blade combos with team ultimates devastate grouped enemies, particularly in garden and control center.
Widowmaker dominates with proper positioning. Her hitscan accuracy rewards players who secure high-ground sightlines before team fights. A single pick from her before a fight often determines the outcome. But, she requires mechanical precision and vulnerability to close-range diving.
Cassidy excels at dueling mobile heroes and securing kills at range. His close-range burst damage threatens enemy back lines, and his ultimate provides safety or secures multiple picks depending on timing.
Junkrat is a controversial pick in coordinated play but dominates uncoordinated matches. Grenades spam pressure through tight corridors, and his ultimate forces enemies off high ground or into bad positions. Pro players avoid him due to his unreliability against mobile heroes.
Support Heroes For Team Success
Lúcio is essential on Lijiang Tower. His speed boost enables rotations and disengages while his high-ground mobility matches other mobile heroes. Sound barrier protects the team during vulnerable moments, particularly before engagements or when escaping.
Zenyatta provides unmatched damage from range. His Discord Orb enables your team to burst enemies off high ground before they establish threat. Transcendence saves teammates from burst damage, turning lost fights into stalemates.
Ana excels at controlling space with sleep dart and anti-heal grenades. Sleep preserves allies from coordinated burst damage, while anti-heal denies enemy supports from keeping their team alive. Her hitscan accuracy rewards positioning and gamesense.
Mercy is weaker on this map due to limited protection and vulnerability to ganks. Her mobility helps teammates reach high ground, but her survivability is lower than other supports in this fast-paced environment.
Kiriko provides teleport escapes and group healing through proximity. Her kunai damage complements fast-paced engagements, and her ultimate provides guaranteed protection during dire moments. She’s particularly strong in garden where multiple flanking routes make her teleport valuable.
Attacking Strategy & Map Control
Attacking on Lijiang Tower requires coordination and understanding which territory matters most. Rushing the point with zero setup often yields feeding fights where your team dies staggered.
Early Game Positioning & Rotations
Start by establishing map control around the approach to each control point. Don’t immediately contest the objective: instead, secure the high ground and advantageous positions surrounding it. This accomplishes two goals: denying enemy high-ground access and forcing defenders to either fight on unfavorable ground or give it up.
On night market, send your most mobile heroes toward the stalls immediately. Tracer and Genji should secure the highest available position while your team moves methodically toward the chokepoint. Forces split across the plaza often fragment, allowing defenders to pick off isolated players. Maintain group cohesion while rotating.
Garden requires a slightly different approach. The multiple access points tempt splitting forces, but unsupported flanks get intercepted. Instead, establish presence on multiple high-ground positions simultaneously, then commit your team once those positions are secured. Coordinate ultimates before moving as a group onto the point.
Control center demands respecting the elevated objective. Moving directly up the stairs is suicide: instead, secure the surrounding high ground first, then use that superior position to cover allies stepping onto the point. Window control determines whether your team reaches the point or gets sniped from range.
Pacing matters enormously. Moving too fast without map control wastes ultimates on lost fights. Moving too slowly burns time and allows defenders to stack their ultimate economy. Identify which positions your team needs, secure them, then commit to the point.
Spawn advantage determines fight outcomes. If defenders spawn closer to the point, establish full map control before engaging. If attackers have spawn advantage (particularly on attack), use that respawn time to maintain pressure and secure multiple fights without full wipes.
Ultimate Economy & Team Fights
Ultimates are currency on Lijiang Tower. Trading ultimates without securing point progress is a net loss, even if the fight ends 6v0.
Build ultimates through poke damage before committing to major team fights. Your Widowmaker landing picks, your Ana landing sleep darts, these actions build ultimate charge without forcing a 6v6 engagement. Once you’ve built one or two high-impact ultimates, then commit as a team.
Coordinate ultimate timing before fights. Genji blade combos with Lúcio amp mean massive damage output. Tracer pulse bomb into enemy backline followed by Zenyatta discord orb secures kills. Plan which ultimates synergize, then execute that sequence rather than using them randomly.
During fights, recognize win conditions. If your team has ultimate advantage and has secured high ground, push for point presence and force enemies to contest. If the fight is even, play for picks and reposition rather than committing to the point. Point progression means nothing if three of your players are dead.
Manage deaths carefully. A 5v6 deficit in ultimate economy is brutal, particularly when defenders have defensive ultimates ready. Stagger deaths intentionally: trading one death for one enemy death is often correct during point contests, but dying first in an even fight gifts the enemy time to reorganize.
Dueling matters. Tracer securing kills on Widowmaker improves your team’s fight potential. Zenyatta discording the enemy Reinhardt enables your Junkrat to position freely. Individual duels determine whether team fights are 6v6 or 5v6 before major abilities activate.
Defensive Tactics & Holding Ground
Defense on Lijiang Tower starts before attackers arrive at the point. Winning position trades before engagement begins often determines the round entirely.
Spawn Advantage & Safe Positions
Defenders spawn closer to the objective on all three control points, creating an inherent advantage. Use this by establishing full map control, securing high ground, chokepoint positions, and escape routes, before attackers even contest.
On night market, occupy the market stalls before attackers reach the plaza. A Widowmaker on the far stall with a Sigma barrier protecting her from long-range fire creates an unkillable presence. Attackers must respect her positioning or get picked off immediately.
Garden defense benefits from spread positioning. Rather than stacking on the point, place heroes across multiple high-ground positions covering different approaches. Enemies splitting to access the point get isolated: enemies grouping together become target practice for AoE damage.
Control center defense means claiming the catwalks and elevated positions surrounding the objective. Defenders should be above or on the point itself, forcing attackers to climb into disadvantaged positions. Window control determines whether attackers can even reach the point or get sniped during approach.
Maintain depth in positioning. The frontline holds the chokepoint while supports and vulnerable heroes position behind cover. If the frontline breaks, the backline has room to reposition rather than getting surrounded. One-dimensional defenses collapse instantly when a single hero breaks through.
Manage resources carefully. Supports should maintain positioning that allows escape without requiring teammates to escort them. Lúcio climbing walls, Mercy having team members to fly toward, Kiriko with teleport available, these options keep supports alive longer than stationary positioning.
Counter-Play & Burst Potential
Defense revolves around converting superior positioning into kills. Burst potential determines whether defenders hold or crumble during contests.
Brigitte deployed on chokepoints secures guaranteed healing through Rally while dealing armor damage. Enemies pushing through her position either die or retreat, both outcomes favoring the defender.
Ana sleep dart interrupts coordinated team fight initiations. A Tracer diving backline gets slept, your team repositions, and the enemy team fight dissolves before starting. Her grenade denies healing, forcing enemies to disengage or risk dying to preventable damage.
Widowmaker and Cassidy both threaten immediate elimination. A picked support leaves attackers without healing: a picked tank forces the team to bunch closer for safety. Protect these heroes through positioning while they secure picks.
Sigma barrier placement denies enemy high-ground access entirely. Placing Accretion as enemies approach funnels them into tight positions. Grasp immediately converts incoming ultimates (Genji blade, Tracer bomb, Dva bomb) into resource advantages.
Defense requires patience. Attackers must contest the point: defenders can wait. Overcommitting to kills in the chokepoint often backfires when you get caught out of position. Trade space for kills when possible, then regroup rather than chasing retreating enemies.
Ultimate economy matters equally on defense. Your Lúcio sound barrier saves the team from Genji blade: your Zenyatta transcendence survives Tracer bomb spam. Plan which ultimates counter enemy threats, then use them reactively rather than proactively.
Sentrying positions works exceptionally well on this map. A Widowmaker or Cassidy camping high ground forces enemies to either respect them (limiting rotation options) or commit extra resources to killing them (wasting time and coordinate). Rotations and swaps break these setups, but forcing enemies to adapt to threats wins rounds even without kills.
Common Mistakes & How To Avoid Them
Even strong players misread Lijiang Tower’s demands, leading to avoidable losses. Recognizing these patterns prevents repeated failures.
Ignoring High Ground Entirely. Players often push the point directly without securing surrounding high ground first. This guarantees getting farmed from above. Always identify which positions enemies control, then claim your own before point engagement. A team controlling high ground with zero point presence beats a team contesting the point from low ground nearly every time.
Overextending During Picks. Securing a kill on an isolated support feels great until three enemies collapse on you simultaneously. Picks matter, but only if you survive to benefit from the advantage. Pick safely near teammates, retreat immediately, and let the pick translate into objective progress rather than trading kills.
Failing to Recognize Stagger. When defending, some players retreat too far into spawn, allowing a staggered fight where enemies spawn and immediately rejoin while defenders slowly trickle back. Maintain positioning closer to the objective even during losses. Staggering defenders is essentially gifting attackers point time without fighting.
Wasting Ultimates Reactively. Using Lúcio sound barrier because enemies are pushing, then having nothing for the actual team fight five seconds later, wastes the resource. Save critical ultimates for moments that determine outcomes rather than using them to delay inevitable defeats. If the fight is unwinnable, fall back and regroup rather than burning ultimates to extend the inevitable.
Ignoring Flank Routes. Lijiang Tower has multiple access routes. Focusing entirely on the primary chokepoint allows enemies to push through flanks with minimal resistance. Rotate players to monitor secondary access points, or commit to shutting them down with your team rather than leaving them undefended.
Playing The Point Instead of Positioning. Beginners often stand directly on the objective thinking it guarantees control. High-ground threats immediately eliminate point standers. Control the point by controlling the surrounding area, then move onto the objective once it’s safe. Low-ground point presence is a death sentence against competent opponents.
Bad Positioning Relative to Team. Supports playing aggressively away from peel range, tanks pushing without backline follow-up, DPS not respecting angles they can’t duel, these spacing mistakes fragment teams. Maintain positioning where teammates can support each other, enabling everyone to survive longer and deal more damage collectively.
Recent esports competitive guides outline how professional players manage these scenarios, demonstrating map control before objective contests. Understanding professional approaches helps translate theory into gameplay.
Conclusion
Mastering Lijiang Tower transforms you from a player fighting on the map into one controlling it. The three control points demand flexibility, night market punishes poor positioning, garden rewards split coordination, and control center favors defined high-ground setups. Success requires understanding which heroes enable your gameplan, establishing map control before engagements, and recognizing when fights are winnable versus when spacing demands caution.
The meta evolves with patches and seasonal changes. Balance adjustments shift which heroes enable point control and which strategies work. Stay current with patch notes and pay attention to how professional play adapts to changes, your favorite strategies may need tweaking as the game develops.
Practice these fundamentals consistently: respect high ground, rotate through proper routes, secure ultimates before commits, and maintain team cohesion during rotations. The map itself teaches through repeated losses and wins: use those experiences to refine your understanding. Climbing through Lijiang Tower matches proves mastery more convincingly than any guide, and this foundation accelerates that learning curve significantly.